Tuesday, September 25, 2012

A Photo Contest results

Recently I entered some photos into a photo contest that was done by one of the photo clubs I am a member of. I was pleased with how I did. I would have loved to have placed in everything I entered but realistically I know that is not possible especially with several of the phenomenal photographers that are members. One of the best parts of entering into this club's contest is the feedback on how to improve my photography.

Here is the photo that won the Open Category and was runner up to Best of Show. It is the Decorah Bank Building. This was taken in July at the Nordic Fest and was a HDR. I have had this photo on this blog when I talked about building an HDR.

I had an Honorable Mention with my Black and White Spider Web. This photo was on this blog last week.

My other Honorable Mention was the San Fernando Cathedral in San Antonio. This was the photo that was accepted into the State Fair and discussed in that post.


Sorry that there is not as much content to my blog this week, but it has been a very busy week and I did not have much time to write.

Tuesday, September 18, 2012

Black and White or Color?

Black and White or Color is a questions that photographers have to ask themselves about their photos. When film was used it was a no brainer you had to use what was in your camera, so the decision was made earlier when you loaded film in your camera. With digital you can make a choice in post processing. Many photographer shoot in color and convert to black and white with the computer though the digital cameras can shoot black and white. I am one who tends to convert to black and white with the computer because that way I can make the decision based off what I think looks best for the photo. Most of the photographs I take do not make great black and white photographs but there are some that the color was a so so photo but the black and white was far superior.

Why would one choose black and white? There are many reasons. One reason is that black and white enhance elements of the photograph that color does not. Another reason that the photographer may be trying to create a mood. Still another is trying to give the feeling of a by gone era. Still some photographers just love to work with black and white. There is right or wrong reason for deciding to work with black and white instead of color it is up to the choice of the photographer.

The photographs I am going to share are actually the same photograph only one is the black and white version and the other is color. I think that the black and white version is the better version of the two. I took this photo of the spider web along Boyson Trail early one foggy morning last week using my 100mm Macro lens. The settings for the camera were iso 100, f/11, 1/12sec. Yes, I have actually been carrying my tripod a mile down the trail so I could use it. This thing that caught my eye about this spider web was the shape, size and symmetry and then there was the lovely dew all over the web and near by branches.

Here is the color version of the spider web. It is a nice photograph but it I felt that the green was taking attention from the wonderful dew covered spider web and the drops on the branches.


Here is the black and white version. This one I feel is much better because the spider web is the center of the attention with the plants taking more of a back seat to the spider web.


There is nothing wrong with the color but in this case I feel that the black and white version is the better version because you see the spider web first and the black and white emphasize the lines of the web that are coated with the dew. While you do see the web in the color version I don't feel that the lines of the dew covered web are as strong while the plants are trying to capture your attention.

As to how I converted the photo from color to black and white I used Adobe Elements and clicked on the convert to black and white and then played with the different black and white settings until I was happy with it. I did do some editing to the contrast and brightness in both the color and black and white versions. I know that you can do this in Adobe Lightroom, I have done black and white conversions in Lightroom, and in Photoshop and probably in all photo editing software. I choose to use Elements because I am used to using it.

If you get a chance take time and have fun playing with black and white versions of some of your photos.

Tuesday, September 11, 2012

Robotics: taking sports pictures in low light

This past weekend was the kickoff for the FTC, FIRST Tech Challenge, 2012-2013 season. I was one of the photographers for FTC Iowa at the event.

This is a great program because it gets kids interested in Engineering, Computers, Math, Designing and Sciences through hands on experience. At the beginning of the season the game is revealed and the kids have to design and build a robot so they can compete against other teams at competitions. The FIRST organization has programs from elementary with Jr. Lego League through High School Robotics. It is also a great way for adults get to involved by helping with a team. You do not have to be an engineer or scientist only be willing to work with the kids. I am also photographer with our local high school teams. To learn more about FIRST you go to their website: FIRST Robotics. For the Iowa FTC you can go to: FTC Iowa. For more about my local high school teams: Linn Mar Robotics. Infomerical over now back to photography.

As a photographer of sports events you often have bad lighting and there is nothing you can do to improve it. If you are inside you usually have to adjust your white balance because of the color of the lights. The lighting may not be one type of lighting but several with areas that may be almost too bright. I have also often found that you often can not use flash or any other added lighting and if they do allow flash you are too far away for it to do any good. So the only thing you can do is to have a lens that can do well in low light and set your camera with a high iso and fast shutter. Even then you might still have problems with pictures being underexposed and lots of noise.

The photos I am going to share are three from this past Saturday. I really likes these because they show the kids intensity and expressions shortly after finding out what this season's game was, "Ring It Up". The kids in the photos are from my high school local teams.

The first photo is of three members of the team looking at the rings that are the playing piece of the game. The challenge of this photo was that the light in the room was very low and there was a light shining off a balcony that caused a bit of lens flare. The photo is a little noisy but still acceptable. I was using my Canon EF-S18-135mm lens. My settings for this photo were: iso 3200, f/3.5, 1/32sec. I wish that I could have used a lower iso, but this was the only way to get the photos.

The second photo is of the young man in the red shirt. He was at a different area of the field looking the rings and the holder there. I love the expression on his face. The photo is a little noisy and my camera almost wasn't fast enough to capture the shot before he moved. I do not ask the kids to be pose for me I work around them getting the shots as they are doing their thing. A challenge on this photo was not just the low lighting in the room but there was a bit of filtered light coming through the glass doors but the lighting that was filtering was not natural light but light from another room that had something else going on. The settings for this photo were: iso3200, f/3.5, 1/32sec.

My last photo is of one of the members measuring the plywood base that is in the center of the field. This area was better lit but as you can see from the shadows it was not centered on the field instead it was off to one side. The team was measuring all the different parts of the field so they when they build their own practice field they will know exactly how the official one was built. I love how intense the young man was he was oblivious to what was around him. My settings for this photo were iso 3200, f/4.0, 1/100sec


The biggest challenge was the lighting and not able to use a flash. I could have used a flash at a small part of this event but unfortunately my flash decided that this was the day to die. Even if I had been able to use a flash I still would have not have been able to at most of the event because of situation. The photos at the field would still had to be without a flash because of the situation. During the competitions I am not able to use a flash at all because it is distracting for the kids and officials during the matches.

Tuesday, September 4, 2012

A barn

Near my house there is an old barn that is interesting to look at and photograph. It appears to be abandoned with lots of antique farm equipment in it. I have been out several times to photograph it and have found that I have been happier when I take the photographs as HDRs because there is so much detail that is captured in the HDR that is not caught in a regular photograph.

I have taken a lot of photos of this barn from many different angles to in order to try to capture what it is about it that intrigues me with it. I am only going to post three of my favorites. These were not all taken on the same day or even the same time of the day. I took all the photos of this barn standing on the side of the road since I have no clue who owns it and I didn't want to trespass.

This first photo is of the side of the barn that has fallen in. You can see a lot of the equipment that is under the remnants of the hay and barn including several antique John Deere tractors. This photo was taken on a clear day at sunset and is composed of 3 brackets with my 18-135mm lens. I have made a print of this photograph on metallic paper and the halos that I see on the screen are not as visible on the print.


The second photo of two of the tractors. I was using a 70-200mm lens and was able to get in closer to see the details of the tractors and other equipment that is in the barn. This photo was taken several days later on a cloudy day early afternoon again using 3 brackets.


The third photo is of the front tractor from a different angle. You can see more details of this tractor from this angle. This was taken the same day and time as the previous photo also using 3 brackets.


I will continue to go back and photograph this barn as the seasons change and the elements take their toll on the barn.

Tuesday, August 28, 2012

Saturday morning marco photo walk

This past Saturday one of the photo clubs I am a member of had a Macro photo walk at a local park. We decided that it should be held at 6:30am so we could get out and shoot before the bugs became too active and the breeze started up. We have several members show and had a good time.

All these photos were shot using my Canon Macro 100mm f/2.8 lens. All of these were shot using natural light.

My first photo from the day is of an orange bug on a yellow flower. I like this photo because of the way the light was on him and the edge of the flower. My setting were: iso 200, f/3.5, 1/100sec


My second photo is of a spider. I like the way he was sitting there with the light hitting him. I would have liked to have taken him from a slightly different angle but he moved when I moved. My setting were: iso 200. f/3.5, 1/100sec


My third photo is of the spider's web. This was a bit of a challenge because I could not get all the web in focus because my depth of field was too shallow and the water I misted it with kept evaporating very fast. My setting were: iso 200, f/3.5, 1/320sec


My last photo is of a bee. He was very active and was a bit of challenge to get one that I liked. My setting were: iso 200, f/5.6, 1/160sec


All of these photos were very minimally edited, most of these have not even cropped.

Tuesday, August 21, 2012

Boyson Trail

I have been on many mornings going out with my camera on the Boyson Trail. The trail goes from near Bowman Woods winding along the Indian Creek through Thomas Park ending at
Hanna Park.

On these walks I take pictures of whatever catches my eye that morning. I don't take a lot of pictures and sometimes I don't quite get the shot I wanted. The nice thing is that I can try again the next time I am on the trail. I will be posting pictures off and on from this trail as we go through the year as a way to see how it changes through the different seasons.

The lens I have had on my camera for these walks is my Canon EF-S 18-135mm f/3.5-5.6 IS Zoom. This lens is not as sharp as my macro but is a better walk around lens.

This first photo is of a squirrel with a nut in his mouth. He chirpped at me until I noticed him and then he ran into the tree. He is not as sharp as I would because I had my camera set too slow because I had been taking pictures of some wildflowers along the trail. The settings for this photo were iso 200, f/8, 1/12sec


The second photo is of two bees on a yellow wildflower. This photo is much sharper than the squirrel but is not as sharp as my macro lens. I took this photo after I had taken the squirrel photo. My setting for this photo were iso 100, f/9, 1/50sec


These are the only two photos that I am going to share this week from my walks along the Boyson Trail. I will be back on Boyson Trail and there will be more photos. This is a very popular trail here I have never been on the trail when I did not run into a lot of other people on it as well.

Tuesday, August 14, 2012

Out early one morning

This past week it has been much nicer so I have been out more to taking photographs. I have been heading to near by park first thing in the morning sometimes before coffee. Usually this time of year the parks flower beds are over flowing with flowers but this year they are not doing as well because of the very hot and dry weather we have been having.

Here are some that I took Friday morning at Noelridge park using my Macro lens using natural light. The reason I chose these to share is that they are bright and cheerful to me.

Here is a Sunflower. I like the way the leaves are pointing both right and left and that there are still a few dew drop still on it. My settings for this photo were: iso 200, f/11, 1/80sec


Here is a bee on a Sunflower. My setting for this photo were: iso 400, f/11, 1/125sec


Here is a close up of the same bee. My setting for this photo were: iso 400, f/11, 1/64sec


Here is the center of a lily with an ant on the petal near the center. I just love the color of this photo. My settings for this photo were: iso 400, f/11, 1/50sec

Tuesday, August 7, 2012

State Fair Results

Earlier this summer I entered 4 photographs into the Iowa State Fair Photography Salon and one of my photos was accepted. This is actually a big deal because only a little over 20% of the photos submitted are accepted.

The one that was accepted was San Fernando Cathedral which is in San Antonio, TX. I took this photograph on March 16, 2012 at 9:30pm.

The other three photos I entered but were not accepted are below:

Iowa State Campanile


Bricks Bar and Grill


Pink Lily


If you have a chance to go to the Iowa State Fair make sure you take time to go through the Photography Salon in the Cultural Center Building. There are a lot of fabulous photos that were entered this year. I would love to post about the winners but I do not have their permission. For the list of the results you can go to the Iowa State Fair website: Iowa State Fair and look under the competition tab for the competition results.

Tuesday, July 31, 2012

Creating an HDR

I have in a previous post talked a bit about HDR photography, High Dynamic Range photography.  In this post I wanted to show the steps used to create the final photo.

These photos were taken recent at Nordic Fest in Decorah, IA.

HDR photos are composite photos. They are created from several photos that are the same except for the f stop. Ideally you try to have nothing change except for the aperture of the lens but if you are outside there might be small movement and the software can help merge things so you do not see "ghosts" created by this movement. There are times however you might want these "ghosts" for artistic reasons.

To compile the photos takes special software. The one I use is photomatrix and I have been happy with it. There are other programs and they are also very good.

I use 3 bracketed shots for my HDRs because this is what my camera has in its software for bracketing photos. There is software available that can do up to 10 bracketed photos and you can also do it manually as well.

The first photo taken for the HDR, this is according to the software in my camera is the one at the correct aperture.

The second photo is underexposed. I set my camera for 2 stops under the first shot.


The third shot is overexposed by 2 stops from the first shot.


After I have taken the photos I download them to my computer and then import them into photomatrix. I do not edit these at all before importing them. I wait until after I have created the composite photo. Once I import them into the program I then choose a style that I want to continue editing the image with. I have found that I tend to use the painterly setting the most and then adjust the image further as needed moving the adjustment slides till I like what I see. After I am done with the merging of the images I may then do further editing in photoshop elements if I feel the image needs cropping or any other edits.

Here is the HDR I created from the 3 photos above.

As you can clearly see the HDR has all the details from the 3 images creating an image that the camera is not able to take with one image and in this case there is more drama in the final photo because of having the full range of highlights and shadows and all the details that were captured in each image that others bracketed shots were not able to capture.

Tuesday, July 24, 2012

One photo different edits

This week has been busy and hot so I have been out to take photos mainly in the morning, before I have even had coffee. I decided look at what different forms of editing can do for a photo.

I took this wildflower this week at Lowe Park here in Marion. It is a pink cone flower that is fairly common. The setting for this photo was iso200, f/5.6, 1/100sec

This was the basic image.

I wasn't happy with this photo because the background had too many highlights.

I decided to try Gray scaling the background.

I still wasn't happy with this the background was still too distracting because of the highlights.

I had suggested to me try darkening the background.
This was better but I felt there was too much background so I cropped the photo.


This version of the flower I think is the best I can get this image. I also upped the color saturation a little bit as well. In this version the flower attracts your attention while the background is not totally nothing it does not distract.

How can I improve this photo. There is not much I can do to make this a really good photo but I did learn several things. I will make sure I have a cup of coffee before I head out so I will be a bit more awake.  I definitely will pay more attention to what the leaves in the background are doing in the light. I will set me camera to slightly underexpose the flower so I can do more in editing the photo. I probably would choose I more perfect flower.

Tuesday, July 17, 2012

Macro photography

Macro photography is very close up photography often getting details and images that are not possible any other way. This is a type of photography that intrigues me and I am trying to learn to do better. I love working with macro and while I am not that great at it I am getting better with it as I learn how to see the images and work with the lens.

My macro lens was the lens I bought as soon as I could afford it after buying my camera. I have the Canon 100mm f/2.8 Macro. I would have loved to have bought the 100mm f/2.8L but that was not in the budget and I was told by several photographers who do wonderful macro work that the lens I bought was terrific. I have to agree that it is a very sharp lens.

Here is an early attempt with the macro lens. Chocolate Covered Cherry, the setting were iso 800, f/4.0, 1/12sec
 While I like the photo I can see how I could have improved it. My iso was was too high, my f stop way too low, I should have positioned my lighting better and a slightly different angle would have made it more interesting.

As I have played with the macro lens outside as well as inside. Here is a dandelion puff that I took in my yard. The settings for this photograph were iso200, f/11, 1/40sec
In this photograph I like how you can sense the silkiness of the dandelion puff while seeing the detail of the puff, but the problem with this is the background. I should have been in a different angle. The green/white line is very distracting. While I would have loved to try again shooting the dandelion puff I was not able to because we did not have more in our yard or many of the normal places this year because of the weather.

I played with the very close up as well. This is a circuit board that we had lying around the house. The settings for this photo was iso200, f/5.6, 1/32sec
This photo does show an improvement in my ability to handle the lens and is better that the others there are still a couple of things I would change. I would use a more indirect but even lighting maybe even a back lighting at the same time. I think that this would bring out the colors of capacitors. I love the intricacy of circuit boards. They are often tiny works of art but there is something about this photo that is sterile and a bit boring to me.


This last one is a rose that was part of a bouquet that my husband gave me. The setting for this photo are iso200, f/11, 1/6sec
One of my recent ones was an experimental one because I was playing with my reflector and using a desk lamp for the light source. I am please with the depth of field, the color, the shadows and the background. To allow me to control the camera and lighting easier I used my cable release for my shutter. On this photo I sprayed the rose to create more texture but I think I went a bit overboard with the spray. I do think I need more practice.

I decided to try again with the rose, a couple of days later, only this time be a bit further away and use only one drop of water. The setting for this rose are iso200, f/11, 1.0sec
I like the drop falling off but think that even thought I also was trying to diffuse the lighting a bit the shadows are a bit harsh but I still like this photo.


As you can see there is a definite improvement with each photo but there is still lots of room of improvement and experimentation in my adventures in Macro photography.

Tuesday, July 10, 2012

Fireworks Again

I tried shooting fireworks earlier this summer at a Kernels baseball game but the photos were not the long tails that and brilliant lights that we associate with fireworks.

My problems was that my iso was too high, my f stop too low and my shutter too fast and needed a tripod to hold the camera.

I had another chance on July 4. We, my family and I, decided to go to the Kernels game and watch the fireworks they had. We also were able to see the Cedar Rapids Downtown ones from the game as well and occasionally there were other fireworks going off.

This time I lowered my iso to 100, raised my f stop to f/11, and used my shutter remote to have the exposures of 2 seconds or longer. While I was not able to take in my tripod I was able to take my monopod. These were  much better.

This was one at the very beginning when the field lights were not completely dimmed. I really like the the field in the foreground with the fireworks with long tails in the back and the starring of the fireworks just before they exploded.

The next two are during the Kernels firework show with the downtown fireworks in the background.

The next two are after the Kernels fireworks show ended but the downtown one was still going on. These were further away and we had a little bit of monopod movement but I like the effect it gave to these.


These are a lot more interesting that my previous attempt with fireworks. I can still see a lot of room for improvement but these are so much better. A tripod would have been better because they are much stabler than a monopod but the monopod made these possible because there was no way I could have hand held my camera for these. Also using my shutter release cable allowed my to have longer exposures without adding any movement from pressing the shutter release button on the camera.

Tuesday, July 3, 2012

Photo contests

It is that time of the year. The beginning of Photo Contest season. It seems to me that it starts in summer and goes through the end of the year. Many contests in the same area will stagger them so people can enter several of them using the same photos.

I do like to enter some contests for various reasons but the main ones being is seeing what other photographers are doing, seeing how well I am doing technically to other photographers and getting feedback from others. There is no guarantee to any photography contest because, as with all arts, the judging always is subjective. It can be technically perfect and lose out to one that is not as perfect but it really appeals to the judges. Often times the only feedback you get is looking at the other photographs but by seeing what was judged the best at the show can help you improve your photography or see what trends are popular, one show does not show a trend but several do.

Recently I have entered photographs into two contests, The Iowa State Fair Photography Salon and the Linn County Fair. I will not know if any of my photos were accepted for the State Photography Salon much less placed until late July, there was a limit of 4 photos. I am realistic enough not to expect any of my photos to be accepted into the salon.

The County Fair was this weekend and I did well. All ten of my photos were hung and 3 placed in their categories. I did noticed that in many of the categories that the very colorful, almost over saturated, photos did better that the ones that were less colorful. While one of my Black and Whites did well, for the most part B&Ws did not do well. I also noticed that while the county allowed any size photo up to 11X14 almost everything that placed was 11x14 or matted up to that size. I have noticed that in most contests the larger photos do better and many are now requiring the outer dimensions to be 11X14.

I placed first in Creative Enhanced. The photograph is an HDR of Mission Espada, this is in San Antonio, TX, that was printed on metallic paper. The metallic paper really made the photo pop. This one was the only one of my photos that had judges comments- "Excellent use of HDR, Choice of metallic paper really gives this piece and embossed feeling!"


I placed second in Nature. The photograph is of a Door County, WI Fish Boil. This photo has very little editing. Mainly just a little bit of cropping. This was also printed on metallic paper which made the flames look almost 3D. The reason I choose Nature as the category was that this was it fit best.


I also had another second place photo. This one was in the Still Life. It is a Black and White of Wild Rye. This was taken at Wickiup Hill. I choose this one as a Black and White because I liked how the Black and White brought out the  graceful lines of the plant where as the color was boring.

As you can see these are each a very different style from each other but each of them appealed to the judges in one way of another.

Tuesday, June 26, 2012

Renting Lenses- a great way to try out lenses

As a relatively new photographer, at least with a digital SLR, I do not have very many lenses for my camera. Choosing that next lenses can be a challenge because there are so many different lenses on the market and because good lenses are expensive you don't want to buy one that you will not use because it does not suit how you shoot.

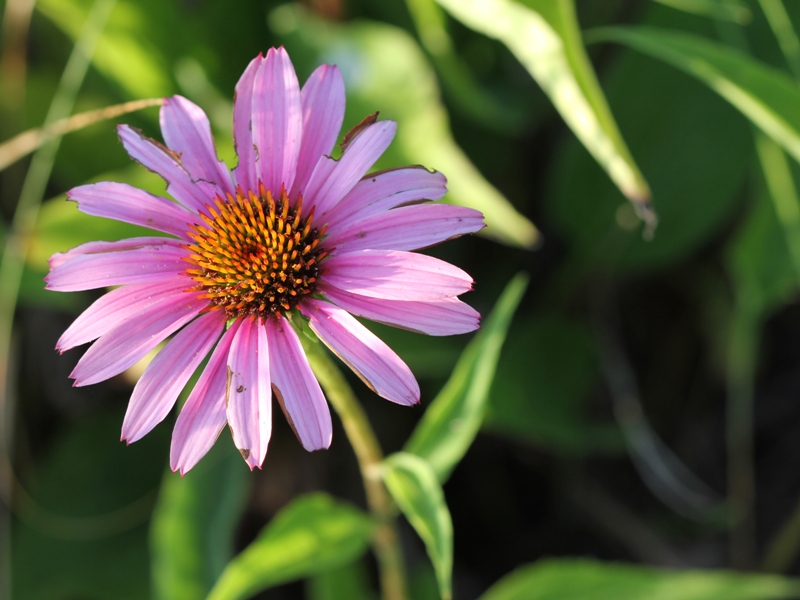
Sometimes you know from what you like to shoot what lens you want/need. I knew that I needed a Macro lens because I love to shoot flowers and insects up close. I researched which lens would suit my needs and budget. The budget is always a factor because I know very few people who do not have to worry about the expense of lenses. This does not mean that cheaper is better, no often you have to seriously consider which level lens will meet your needs. Sometimes only the top level lenses will meet your needs and sometimes you can go a level below because you do not need everything on the top level lenses.

This was the case with my Macro lens. I knew that I needed a Macro lens because I loved shooting flowers and insects up close and this would take a macro lens. I choose a Canon 100mm f/2.8 Macro instead of the L version of this lens. The reason is that while I would love to have image stabilizing on the lens most of my close up work is on a tripod and the non L lens was about half the cost of the L lens and is an excellent lens.

For my next lens I know that I want a telephoto zoom that is longer and sharper than my walk around lens. I have not been sure which lens would fit my needs. In order to make sure that I buy the lens that I will use I decided to rent lenses to try them out.

Another reason to rent lenses is when you need a specialty lens but will not use it enough to justify the cost of the lens. This can be very true with super telephoto lens.

There are several companies that rent lenses. I asked several photographers about renting lens and they said that both lens rentals and borrow lenses are good companies to work with, but that they liked Lens Rentals a little bit better because if you reserve a lens you are guaranteed the lens even if they have to buy one. I have used Lens Rentals and have been very pleased with them.

I was looking at the zoom starting at 70mm and zooming longer.

I was thinking that I might want a zoom that zoomed up to 300mm. I rented several 70-300mm lenses and discovered that I did not care for the lens.

I first rented the Canon 70-300mm f/4-5.6 IS. I did not like this lens. It felt like it was jerky and the lens rotated to focus which meant that I could not use a circular polarizing filter. I like to use a circular polarizing filter outside especially on sunny days so not being able to use one would not suit me. I will admit that the lens was sharper that my regular and was not too heavy to use but still I could tell that if I bought this lens I would not be happy with it and probably would not use it often.

I rented next the Canon 70-300mm f/4-5.6L IS. I didn't care for this lens either. It was smooth in using and I could use the same filters that were on my regular lens, but it was heavy and felt it had to big of a diameter for me to hold comfortably. I also found that if felt awkward on my camera to me. The images I took with this lens were sharper that the non L lens. I could tell that I could see owning at some point in the future a 300mm or longer telephoto lens to use on my tripod for some occasions but I will wait a while before I consider buying it.

I decided not to rent any other 70-300mm telephoto zooms. I could tell that this was a just a bit long for regular use for me. I try another lens of this length by borrowing it from a friend and still did not care for that lens.

I recently rented a Canon 70-200mm f/2.8L IS II. I loved this lens. On a recently trip to Wyoming this lens was often on my camera. It fit my hand well and while it was heavy I could still use it all day without a problem. It is a very versatile lens. I wish that I had a circular polarizing filter that fit it but it is a different size that my regular lens. I could easily see using it a lot. The big downside to this lens is the cost. I will also consider the 70-200mm f/2.8L IS, the model just before this one, because it is an extremely sharp lens but it a little less expensive.

I am planning on renting wide angle lenses and other telephoto lenses.

I wish that I had a wide angle lenses with me on our trip to Wyoming but I know that this is a lenses that I probably will not ever own because I do not see using it enough to justify the costs.

I also plan to rent more telephoto lens so I can see which length that I feel comfortable working with enough to justify owning. I do want to do more astrophotography so a longer lens will be needed.

I think that renting lenses is a great way to try out lenses to see if the lenses will work with the way you shoot or if it is a lenses that you will not use enough to justify the cost of the lens. The cost to rent lenses has seemed reasonable to me, rental lengths range from a little as 4 days to as long as 90 days. You do have a choice with both of the companies, I have mentioned, of adding insurance or not. I added insurance when I knew that I was flying, even though I was carrying my photography equipment, I still wanted to peace of mind. I did not add the insurance on a road trip because I felt comfortable about keeping the lens safe.

Tuesday, June 19, 2012

Panoramas

Recently we went to  Western Wyoming for my nephew's graduation. We took this opportunity to also do a bit of sightseeing as well. On the way out we went through the Snowy Mountain area of the Medicine Bow Mountains and on the way home we went through Grand Tetons National Park, Yellowstone National Park and other parks.

The land is just beautiful and vast. It is just too much for a regular photograph, it needs panoramas to do it justice. To try to capture the vast beauty I took a series of photographs that I was able to stitch together with my software to form panoramas. I use several programs depending on what I am doing. I tend to use Adobe Photoshop Elements and the second most is Adobe Lightroom. I have found that these programs while similar do things differently so I use the one that will do what I want the easiest.

The downside to these stitched together panoramas can be very large file size. Sometimes the camera will see colors a bit differently in each image so you sometimes it is very noticeable where the different images were stitched together. This means that you either have to do a lot of work to correct this in the merged image of before you merge.

Here are some of the panorama that I took in Wyoming. All of these were taken with my 18-135mm lens because I have a polarizing filter for it.

This one is was take in the Snowy Mountain area of Medicine Bow it is comprised of 9 images. The settings were 400iso, f/8, 1/800sec


The next one was taken in Grand Tetons National Park, Wyoming it is comprised of 5 images. It was hazy that day so the mountains are not sharp and crisp. The settings were 400iso, f/4.5, 1/4000sec


Panorama can be more than grand vistas such as mountains but also things like lakes, ponds even waterfalls. They can be horizontal or vertical. Both of these were taken at Yellowstone. The first one is one of the prismatic hot springs in the park this picture is comprised of 4 images. This is not the Grand Prismatic Spring but a small one that was near by.  The settings were 400iso, f/11, 1/200sec. Yes, the colors were this vibrant.


The next picture is a vertical picture of Kepler Cascade and is comprised of 4 images. The settings were 400iso, f/11, 1/800sec. I did take more photos to try to merge for this waterfall but they didn't line up nicely so I decided not to use them in the panorama.


Merged Panoramas are a lot of fun and a great way to get the pictures that are too large for a single shot with your camera. Sometimes though the camera will see each photo with a slightly different color. I had this happen. I was using a 70-200mm lens that I was renting and did not have a polarizing filter for it, while this can also happen with a polarizing filter. The setting were 400iso, f/11, 1/400sec. This was taken just outside Laramie, WY. It is comprised of 10 images and it needs a lot of work on blending the colors before I would be able to use for anything.