Tuesday, July 31, 2012

Creating an HDR

I have in a previous post talked a bit about HDR photography, High Dynamic Range photography.  In this post I wanted to show the steps used to create the final photo.

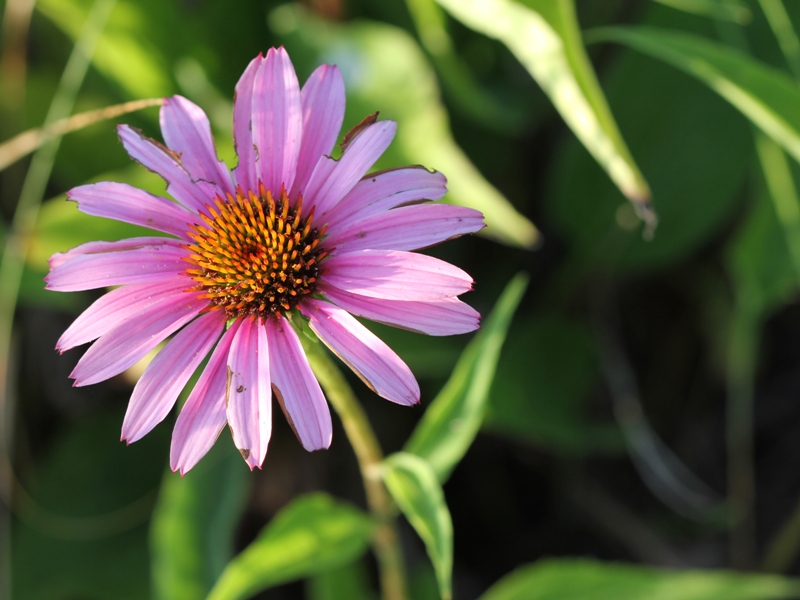
These photos were taken recent at Nordic Fest in Decorah, IA.

HDR photos are composite photos. They are created from several photos that are the same except for the f stop. Ideally you try to have nothing change except for the aperture of the lens but if you are outside there might be small movement and the software can help merge things so you do not see "ghosts" created by this movement. There are times however you might want these "ghosts" for artistic reasons.

To compile the photos takes special software. The one I use is photomatrix and I have been happy with it. There are other programs and they are also very good.

I use 3 bracketed shots for my HDRs because this is what my camera has in its software for bracketing photos. There is software available that can do up to 10 bracketed photos and you can also do it manually as well.

The first photo taken for the HDR, this is according to the software in my camera is the one at the correct aperture.

The second photo is underexposed. I set my camera for 2 stops under the first shot.


The third shot is overexposed by 2 stops from the first shot.


After I have taken the photos I download them to my computer and then import them into photomatrix. I do not edit these at all before importing them. I wait until after I have created the composite photo. Once I import them into the program I then choose a style that I want to continue editing the image with. I have found that I tend to use the painterly setting the most and then adjust the image further as needed moving the adjustment slides till I like what I see. After I am done with the merging of the images I may then do further editing in photoshop elements if I feel the image needs cropping or any other edits.

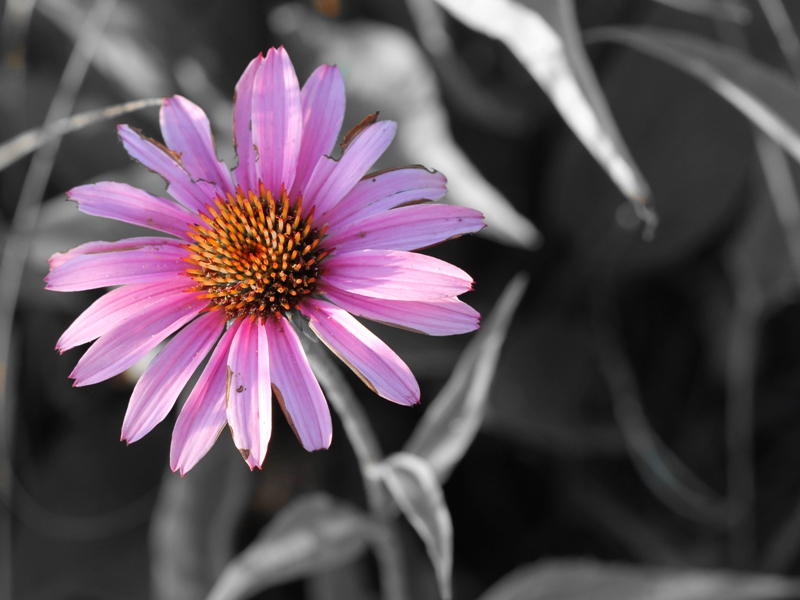
Here is the HDR I created from the 3 photos above.

As you can clearly see the HDR has all the details from the 3 images creating an image that the camera is not able to take with one image and in this case there is more drama in the final photo because of having the full range of highlights and shadows and all the details that were captured in each image that others bracketed shots were not able to capture.

Tuesday, July 24, 2012

One photo different edits

This week has been busy and hot so I have been out to take photos mainly in the morning, before I have even had coffee. I decided look at what different forms of editing can do for a photo.

I took this wildflower this week at Lowe Park here in Marion. It is a pink cone flower that is fairly common. The setting for this photo was iso200, f/5.6, 1/100sec

This was the basic image.

I wasn't happy with this photo because the background had too many highlights.

I decided to try Gray scaling the background.

I still wasn't happy with this the background was still too distracting because of the highlights.

I had suggested to me try darkening the background.
This was better but I felt there was too much background so I cropped the photo.


This version of the flower I think is the best I can get this image. I also upped the color saturation a little bit as well. In this version the flower attracts your attention while the background is not totally nothing it does not distract.

How can I improve this photo. There is not much I can do to make this a really good photo but I did learn several things. I will make sure I have a cup of coffee before I head out so I will be a bit more awake.  I definitely will pay more attention to what the leaves in the background are doing in the light. I will set me camera to slightly underexpose the flower so I can do more in editing the photo. I probably would choose I more perfect flower.

Tuesday, July 17, 2012

Macro photography

Macro photography is very close up photography often getting details and images that are not possible any other way. This is a type of photography that intrigues me and I am trying to learn to do better. I love working with macro and while I am not that great at it I am getting better with it as I learn how to see the images and work with the lens.

My macro lens was the lens I bought as soon as I could afford it after buying my camera. I have the Canon 100mm f/2.8 Macro. I would have loved to have bought the 100mm f/2.8L but that was not in the budget and I was told by several photographers who do wonderful macro work that the lens I bought was terrific. I have to agree that it is a very sharp lens.

Here is an early attempt with the macro lens. Chocolate Covered Cherry, the setting were iso 800, f/4.0, 1/12sec
 While I like the photo I can see how I could have improved it. My iso was was too high, my f stop way too low, I should have positioned my lighting better and a slightly different angle would have made it more interesting.

As I have played with the macro lens outside as well as inside. Here is a dandelion puff that I took in my yard. The settings for this photograph were iso200, f/11, 1/40sec
In this photograph I like how you can sense the silkiness of the dandelion puff while seeing the detail of the puff, but the problem with this is the background. I should have been in a different angle. The green/white line is very distracting. While I would have loved to try again shooting the dandelion puff I was not able to because we did not have more in our yard or many of the normal places this year because of the weather.

I played with the very close up as well. This is a circuit board that we had lying around the house. The settings for this photo was iso200, f/5.6, 1/32sec
This photo does show an improvement in my ability to handle the lens and is better that the others there are still a couple of things I would change. I would use a more indirect but even lighting maybe even a back lighting at the same time. I think that this would bring out the colors of capacitors. I love the intricacy of circuit boards. They are often tiny works of art but there is something about this photo that is sterile and a bit boring to me.


This last one is a rose that was part of a bouquet that my husband gave me. The setting for this photo are iso200, f/11, 1/6sec
One of my recent ones was an experimental one because I was playing with my reflector and using a desk lamp for the light source. I am please with the depth of field, the color, the shadows and the background. To allow me to control the camera and lighting easier I used my cable release for my shutter. On this photo I sprayed the rose to create more texture but I think I went a bit overboard with the spray. I do think I need more practice.

I decided to try again with the rose, a couple of days later, only this time be a bit further away and use only one drop of water. The setting for this rose are iso200, f/11, 1.0sec
I like the drop falling off but think that even thought I also was trying to diffuse the lighting a bit the shadows are a bit harsh but I still like this photo.


As you can see there is a definite improvement with each photo but there is still lots of room of improvement and experimentation in my adventures in Macro photography.

Tuesday, July 10, 2012

Fireworks Again

I tried shooting fireworks earlier this summer at a Kernels baseball game but the photos were not the long tails that and brilliant lights that we associate with fireworks.

My problems was that my iso was too high, my f stop too low and my shutter too fast and needed a tripod to hold the camera.

I had another chance on July 4. We, my family and I, decided to go to the Kernels game and watch the fireworks they had. We also were able to see the Cedar Rapids Downtown ones from the game as well and occasionally there were other fireworks going off.

This time I lowered my iso to 100, raised my f stop to f/11, and used my shutter remote to have the exposures of 2 seconds or longer. While I was not able to take in my tripod I was able to take my monopod. These were  much better.

This was one at the very beginning when the field lights were not completely dimmed. I really like the the field in the foreground with the fireworks with long tails in the back and the starring of the fireworks just before they exploded.

The next two are during the Kernels firework show with the downtown fireworks in the background.

The next two are after the Kernels fireworks show ended but the downtown one was still going on. These were further away and we had a little bit of monopod movement but I like the effect it gave to these.


These are a lot more interesting that my previous attempt with fireworks. I can still see a lot of room for improvement but these are so much better. A tripod would have been better because they are much stabler than a monopod but the monopod made these possible because there was no way I could have hand held my camera for these. Also using my shutter release cable allowed my to have longer exposures without adding any movement from pressing the shutter release button on the camera.

Tuesday, July 3, 2012

Photo contests

It is that time of the year. The beginning of Photo Contest season. It seems to me that it starts in summer and goes through the end of the year. Many contests in the same area will stagger them so people can enter several of them using the same photos.

I do like to enter some contests for various reasons but the main ones being is seeing what other photographers are doing, seeing how well I am doing technically to other photographers and getting feedback from others. There is no guarantee to any photography contest because, as with all arts, the judging always is subjective. It can be technically perfect and lose out to one that is not as perfect but it really appeals to the judges. Often times the only feedback you get is looking at the other photographs but by seeing what was judged the best at the show can help you improve your photography or see what trends are popular, one show does not show a trend but several do.

Recently I have entered photographs into two contests, The Iowa State Fair Photography Salon and the Linn County Fair. I will not know if any of my photos were accepted for the State Photography Salon much less placed until late July, there was a limit of 4 photos. I am realistic enough not to expect any of my photos to be accepted into the salon.

The County Fair was this weekend and I did well. All ten of my photos were hung and 3 placed in their categories. I did noticed that in many of the categories that the very colorful, almost over saturated, photos did better that the ones that were less colorful. While one of my Black and Whites did well, for the most part B&Ws did not do well. I also noticed that while the county allowed any size photo up to 11X14 almost everything that placed was 11x14 or matted up to that size. I have noticed that in most contests the larger photos do better and many are now requiring the outer dimensions to be 11X14.

I placed first in Creative Enhanced. The photograph is an HDR of Mission Espada, this is in San Antonio, TX, that was printed on metallic paper. The metallic paper really made the photo pop. This one was the only one of my photos that had judges comments- "Excellent use of HDR, Choice of metallic paper really gives this piece and embossed feeling!"


I placed second in Nature. The photograph is of a Door County, WI Fish Boil. This photo has very little editing. Mainly just a little bit of cropping. This was also printed on metallic paper which made the flames look almost 3D. The reason I choose Nature as the category was that this was it fit best.


I also had another second place photo. This one was in the Still Life. It is a Black and White of Wild Rye. This was taken at Wickiup Hill. I choose this one as a Black and White because I liked how the Black and White brought out the  graceful lines of the plant where as the color was boring.

As you can see these are each a very different style from each other but each of them appealed to the judges in one way of another.